Fan Made Presents
By Andres on 6 September 2018
Fun DIY for books
I really enjoyed the novels of the discovery of witches and since my wife also likes it, it gives me a great resource for presents!
So here I would like to explain a short step by step of the little things I was able to make for her (and for me!).
Laser engraving!
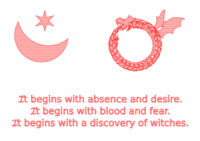
First I wanted to come up with a design. At this point I had only read the first book and my wife was very careful of not giving me any spoilers. So using Inkscape and the resource library it uses, I came up with a simple design. I released it to the public domain in Open clipart. It was very easy to do: as you can see the moon and star are basic shapes and the rest I had to simply remix other drawings found in the library.
So that the laser cutter etches the insides I needed to convert my scalable vector graphics to dxf. In the conversion I needed to make sure there is a filling so I borrowed a tool from engineering called hatch filling normally used to show, in an engineering drawing, a section cut. Of course, Inkscape already has an eggbot extension that allows just that! I added some text to make it more complete (context is everything!).
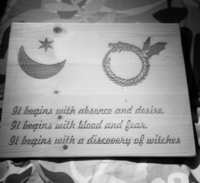
Now the fun part: I cycled over to my near by wicks. And got a bit of timber wood. Normally this is not a good idea because of the grains. The laser cutter cuts the bits without grains deeper than the ones with grains. But it is cheap! Look out for sustainably sourced wood!
I then sand it down so that there is not sharp edges (using a sanding machine in cre-8, not by hand!) it is now ready to put into the Laser cutter which is available at RML, with some careful alignment it was ready to go!
A little bit of cleaning and it was done.
Badge making
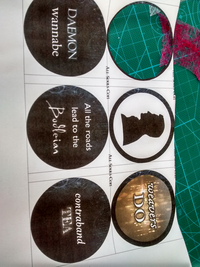
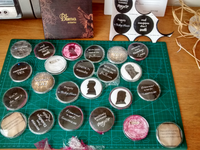
It is viewing party day! People at All Souls Con prepared a little kit with pictures that were meant for cake but we had badges thanks to our friend @kubsat.
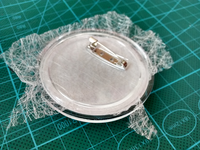
We had some filler material from some left over presents and I used it to hold the badges in place. It also helped to avoid the wrinkles. Pro tip: make sure the circles are slightly smaller than the space for the badge. That avoids wrinkles.
I put on some music: Bilma and got to it, by the time the music was over I was almost done!
Final edit: We really enjoyed it!
